Reply With Quote
Seemingly such a simple fix. I almost feel like I should do this to avoid getting stuck somewhere. I turned 10k this year.
Did you notice the noise in previous days not realizing what it was, or did this just stop on you suddenly?


Good write up! Are you a "Yinzer" or just a fan? :p
Seemingly such a simple fix. I almost feel like I should do this to avoid getting stuck somewhere. I turned 10k this year.
Did you notice the noise in previous days not realizing what it was, or did this just stop on you suddenly?
Can I use thread lock on bolts submerged in fuel or will it degrade?

with the gas now a days I wouldn't, think it would degrade.
50dro, I am definitely a yinzer, although living in the south for a while I also say yall now too...
Netty, yes the pump had been sounding weird for the previous ~50 miles or so.
Well I pretty much finished up tonight. Still need to wrap up a couple things but the pump is all back in. Overall this is a pretty easy job, there are a few things I want to point out though...
The 2003 mustang v6 fuel pump is 99% identical to the oem fuel pump. The differences being:
The sock/strainer is a bit different. The oem is sort of centered under the pump where the mustang it's off to a side and this sort of presents a problem but I fixed that and made it work. The fuel line and electrical connections on the mustang pump are "bigger" if that makes sense, everything fits but just the housing is slightly bigger. This causes slight rubbing between the two fuel lines(really not a big deal, and possible was like this before but I didn't notice it). Due to the way the strainer is, I had to turn the pump roughly 180 degrees to make this work, which may have also contributed to the rubbing. Other than this the pumps appear to be identical, they both even say walbro on them(although oem says USA and the mustang says china).
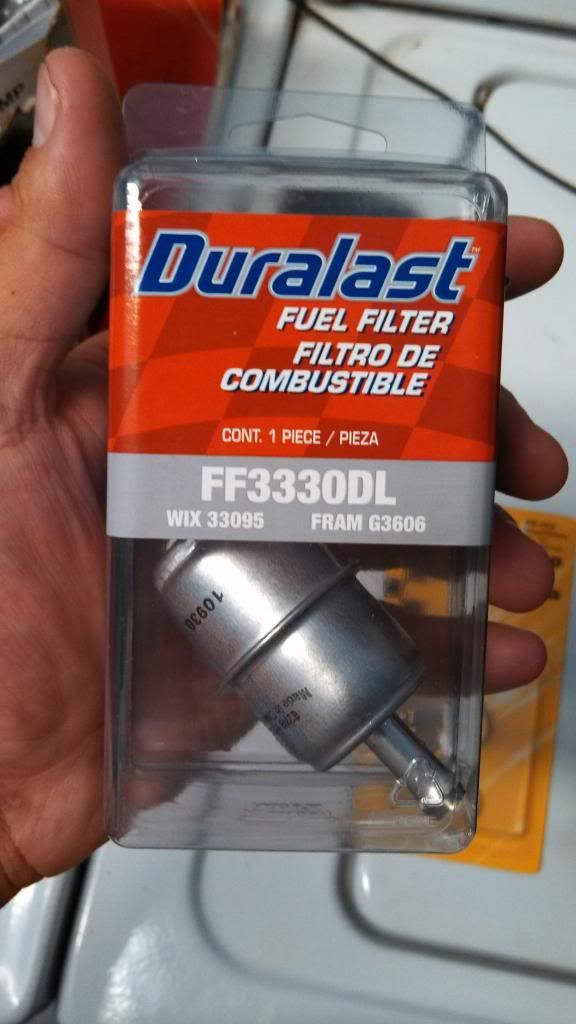
The fuel filters are 99% identical too. Make sure to orient it correctly. The IN side is the side that goes towards the regulator and the OUT side goes towards the throttle body(exiting the pump assembly). Common sense. The oem one was stamped OUT only on one side, the new filter was stamped IN only on one side.
I reused the nylon/plastic fuel lines, they seemed fine. I put a new SS hose clamp where I cut off the oem clamp. Seems fine like this.
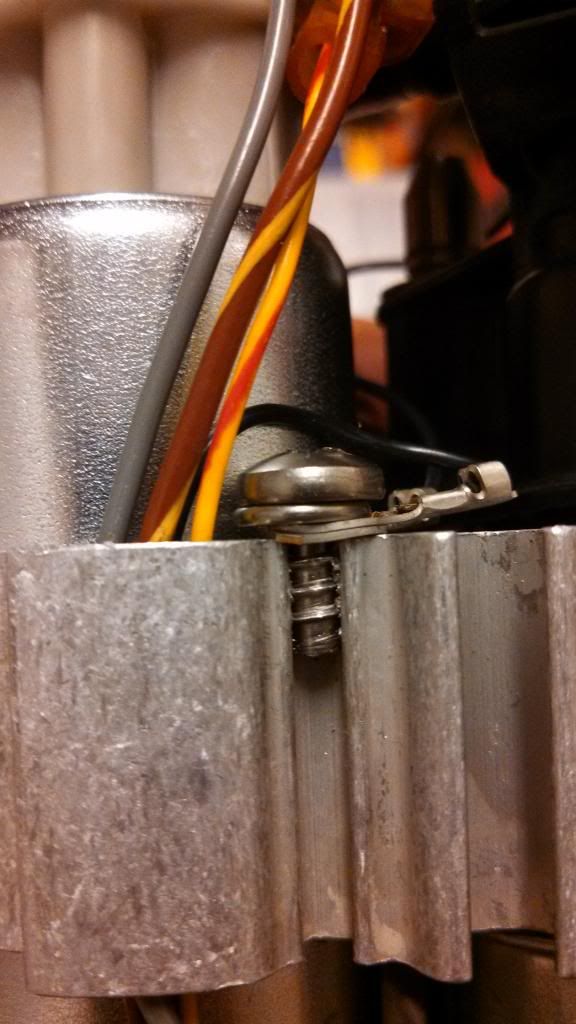
I fixed that loose ground screw I had by first threading it all the way in(this was the original problem). I also put a SS lock washer on it for extra precaution.
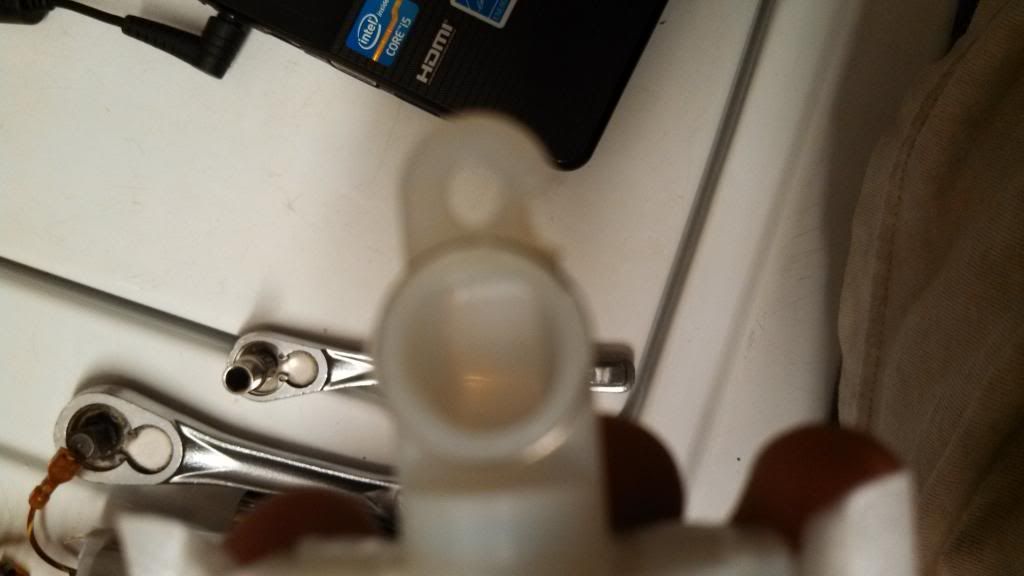
Ok, so there's the "info", but here's what I had to do to make it work. I wish I took a few more pics but the general idea is depicted:
New filter:
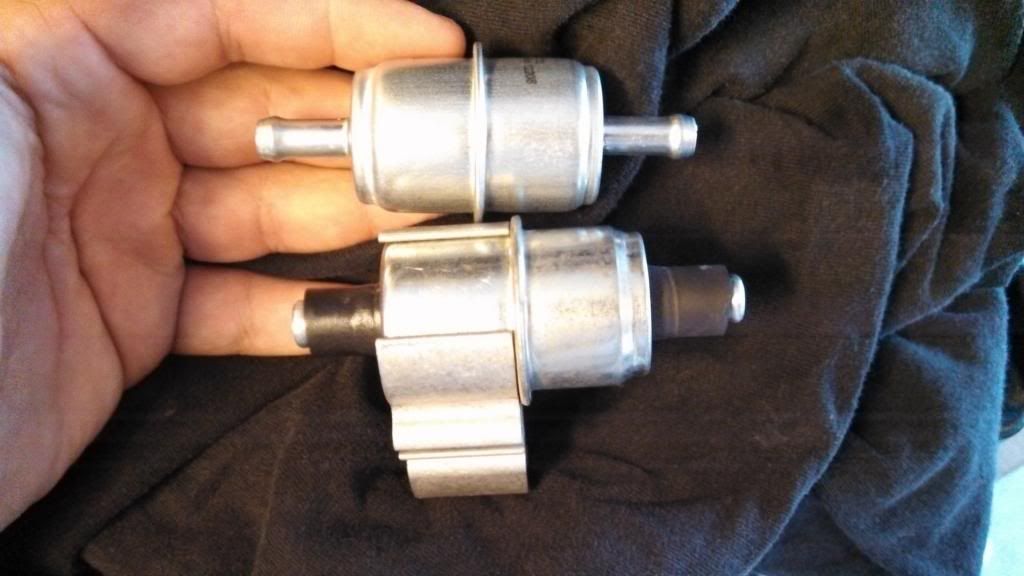
Side by side next to the oem filter(I reused those seals, they slide off):
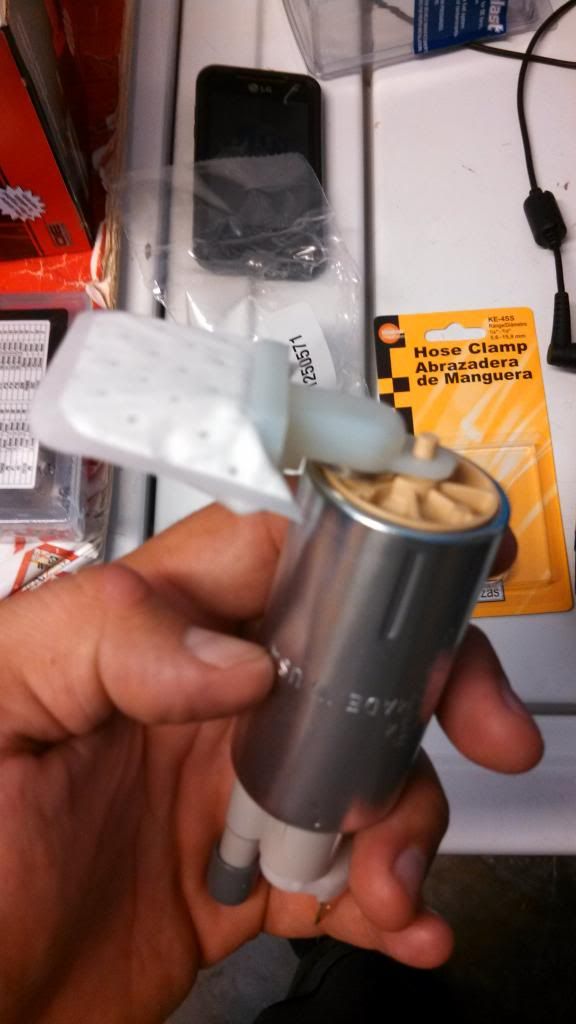
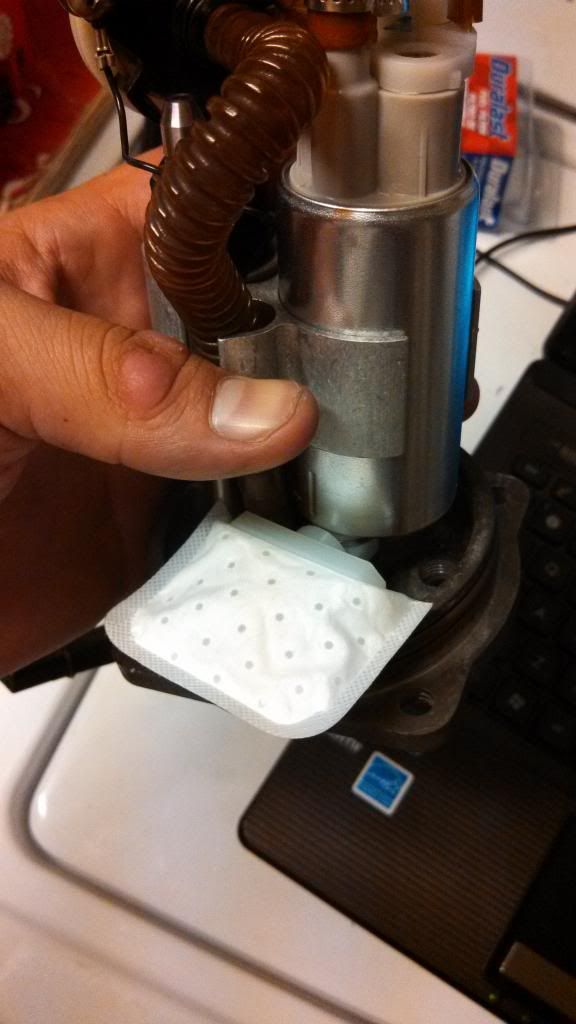
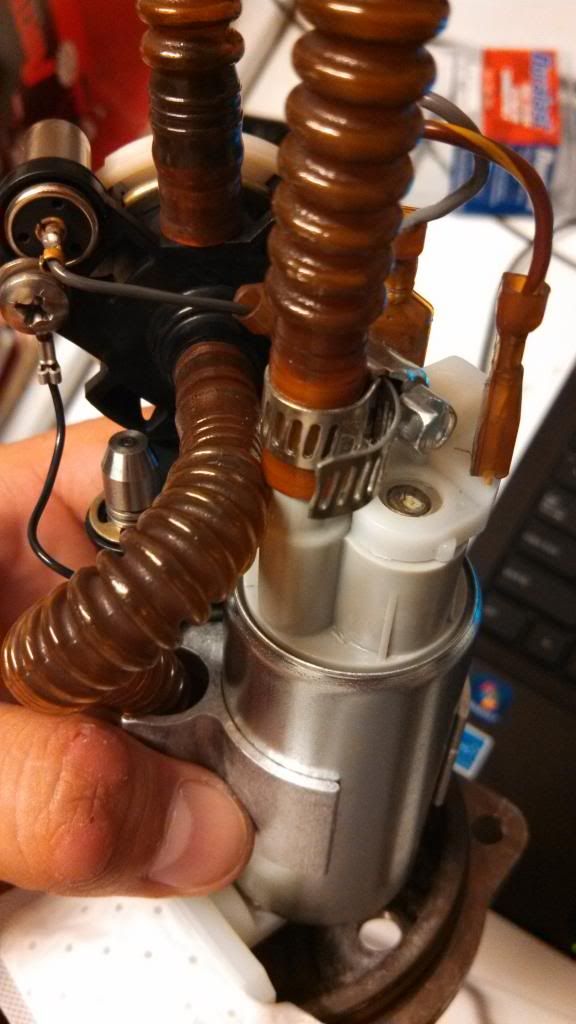
New pump with strainer attached(it just slides on and has an alignment hole). I guess the suction of the pump keeps it on, it's not real loose but not extremely tight.
You can see how the strainer goes off to one side where the oem one was centered under the pump(see previous pics).
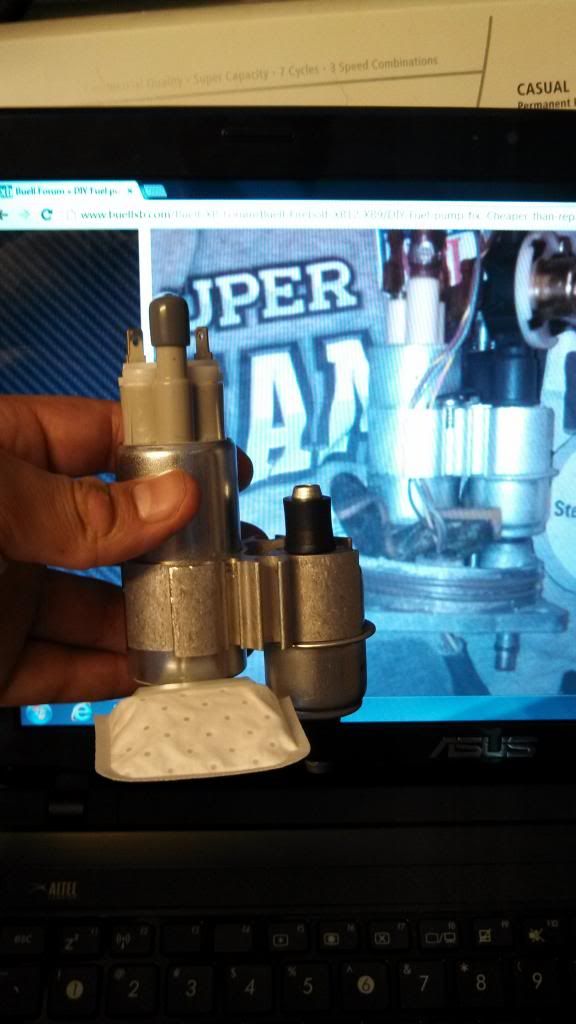
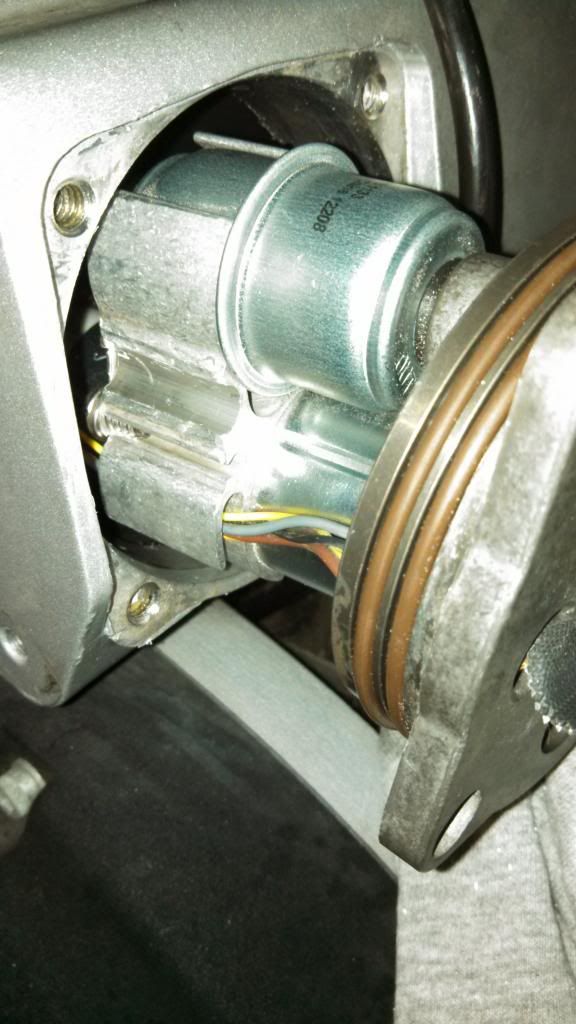
I mocked up everything in the housing bracket in the original orientation and took a pic next to the pic of the oem setup on my computer:
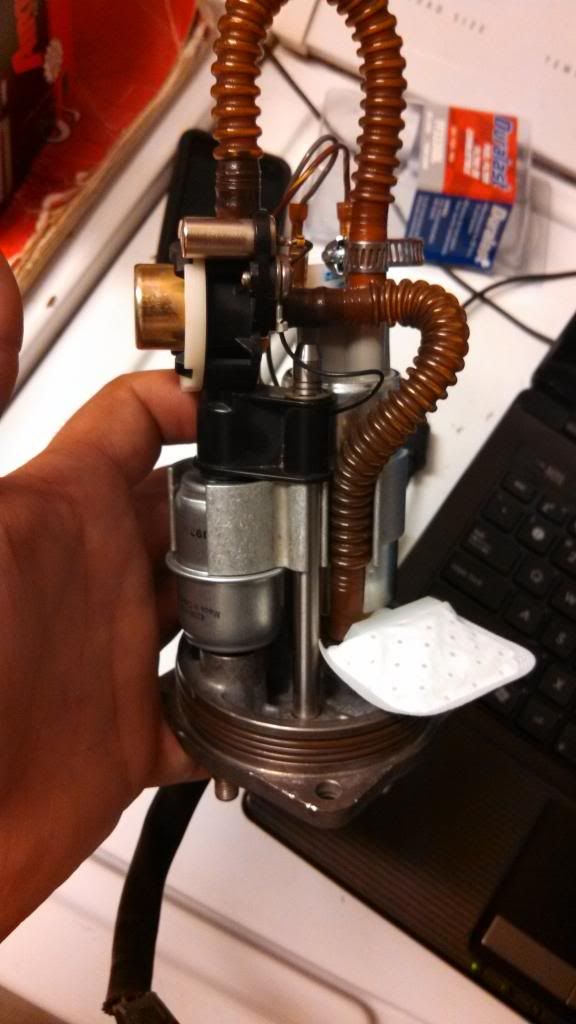
OK - FIRST THING I HAD TO CHANGE to make this work... I basically rotated the whole fuel pump with strainer roughly 180 degrees so the strainer better fit inside the housing:
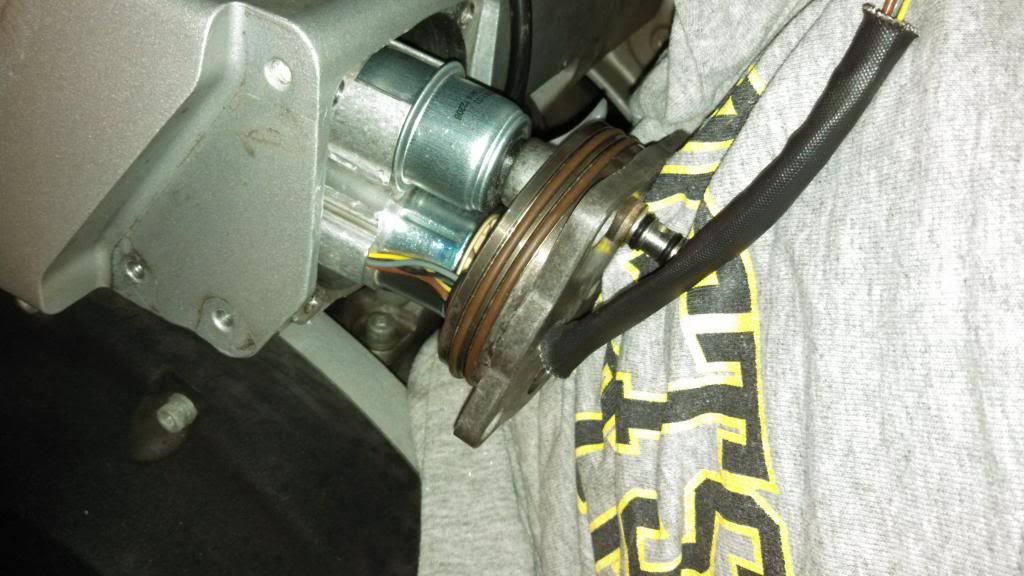
In this picture you can see the new SS hose clamp and the slight rubbing between the fuel lines(I expect it'll be fine). Besides, I THINK the one line that has potential to rub through is just a relief off the regulator and it wouldn't matter even if it did rub through. Also in this picture you can see how the pump was rotated roughly 180 degrees. Look at the oem pictures above, the electrical connectors(2) and the fuel line(1) on the pump are reversed.
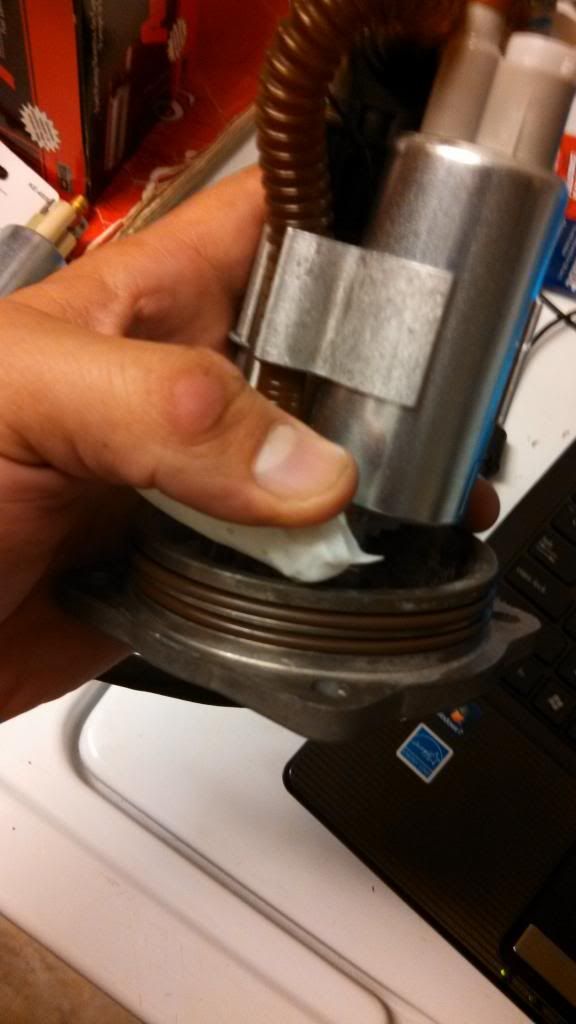
You can see here how with the pump this way the strainer better fits in the housing(althought still doesn't quite fit). I tried to install this way(you can bend the strainer to slip past the frame during install....so I thought) but it was a no go.
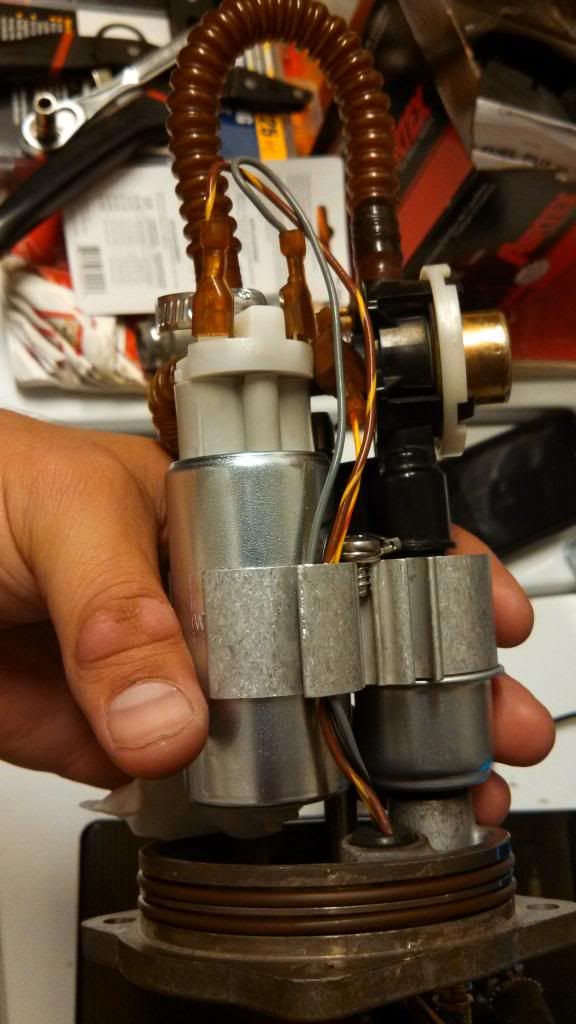
Overall shot showing the assembly completed:
Fixed ground screw(ran threads all the way in before installing wires, so it would crank down). Also installed lock washer:
Here's where I should have taken more pics. Like I said I tried installing with the strainer as was, I couldn't make it go. It MIGHT be POSSIBLE but I did this instead..... Since it just slips on, and the alignment pin doesn't matter, I notched the plastic so I could move the strainer(rotate it) to a slightly better fitting position. You can see in this picture where I notched it just so I could rotate the strainer slightly, this did make it fit more inside the limits of the housing better:
Sorry I didn't take a picture of how it looked after.
Getting the pump assembly out of the frame was next to impossible (like I said in previous post). Getting it back IN was even worse. Especially trying to not damage anything. I think rotating the pump 180 degrees made it harder too as it takes up more room with the electrical connections on the outide, and they are sort of fragile. I spend about an hour just getting the housing back in to the frame. I almost gave up and took the swingarm completely off(I had the shock unbolted). I finally just BARELY wedged it in. Then used a little mirror to look and check that the connections stayed on and everything. I did have to bend the strainer still to get it in the hole, but after it is in it just falls back and is fine.
One other thing I forgot, I had to actually cut part of the bracket that holds the pump to get the assembly back in. It is the part in this picture, just to the right of the ground screw, It's round, looks like you could run a bolt throut it and it has an open side. I cut both "wings" off, if that makes sense. It has no purpose, and gave just enough clearance once cut off.
I also stopped at ACE and they didn't have any o rings that were fuel grade. But I did get some new hardware(replaced the 4 bolts that hold the assembly in) and got new shock mounting hardware as mine was completely corroded(got a grade 8 bolt and SS washers and lock nut). Also got a SS lock nut that holds the fuel line to the pump assembly.
Went to harbor freight and bought the o ring kit for like $4 has like 20 sizes. Says "nitrile" I think, said fuel grade or whatever. I was able to replace the drain plug o ring, and the two o rings that go on the fuel line connection. Couldn't find large enough o rings for the housing itself as they are over 3" diameter. So I reused those 2.
All in all this is actually very easy. The hard part is getting the assembly out and especially getting it in. Other than that it's a piece of cake(if you know these little tricks and have the o rings, etc).
I haven't actually started the bike yet, that'll be friday night. I did hook it up to ecm spy though and put a little gas in there and ran the fuel pump diagnostic and it sounded consistent and "strong" or "normal".
I'll follow up after friday.

All that and you couldn't even push the start button
The suspense would kill me! Actually it's starting to stress me now cause we're taking your truck to the Dragon
Start the damn thing already!!!
:D
Outstanding write up!!!
Very nice right up! I really hope all your hard work pays off. Btw, im not sure if the orings that come off cartridge type oil filters are good for fuel, but they definitely would be the right size, you just got to get the right filter. If any one has input on this im sure it'll help everyone out greatly. I doubt you feel like taking everything apart again though just to change the o rings. But if you do, most mercedes cartridge type oil filters are about 3 inches in diameter. Same with some bmw's and most larger new model cadillacs. Thickness of the o rings will vary though
 Posting Permissions