Page 1 of 2 12 LastLast
Results 1 to 10 of 13

Thread: Cooter does upholstery!

  1. #1
    Senior Member Cooter's Avatar
    Join Date
    Dec 2012
    Location
    Crawling up your skirt
    Posts
    10,897

    Cooter does upholstery!

    Whats the matter fatty? Did you rip your seat cover? Well, ol' Coot is here to help. Grab a beer, sit down, an lemme learn ya with some of the heavy knowledge.
    I like my upholstery like my girlfriends. Cheap and easy! $32 bucks and an hour is all this took me and I'm FAR from a pro. If you know better please post up and tell me how I screwed up


    Not much of a rip, but ugly. the key is to catch it before the foam gets damaged. There are ways to fix the foam too, but the easiest way to fix it... is to not have too.


    pull it off and flip it over. see them staples? Ya theres a lot of them and you'll be taking out everyone of them
    Note how the front corners are done, that wrap makes them much stronger without a place for a tear to start.


    edit: and Eff you photo bucket! I'm not paying $399 a year to host pics! Thank you Flickr
    Last edited by Cooter; 08-30-2017 at 01:18 AM.

  2. #2
    Senior Member Cooter's Avatar
    Join Date
    Dec 2012
    Location
    Crawling up your skirt
    Posts
    10,897
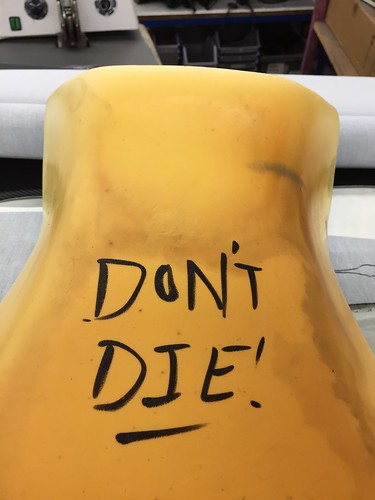
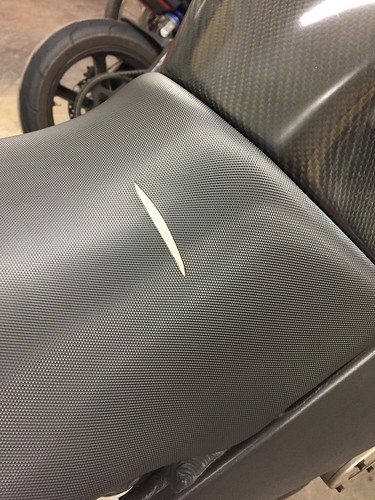
    Don't be scared! Whats the worst that could happen? No, don't ask that...
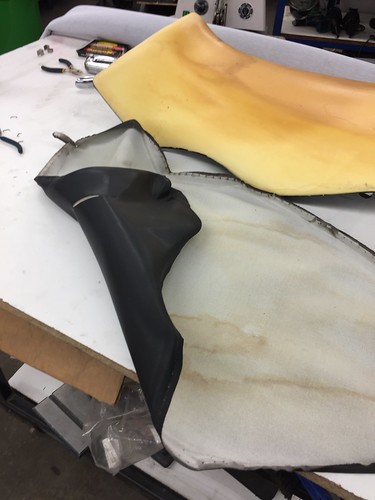
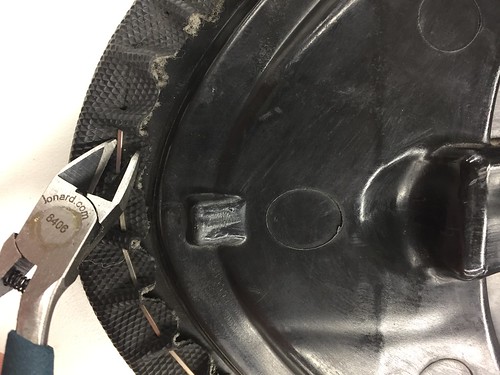
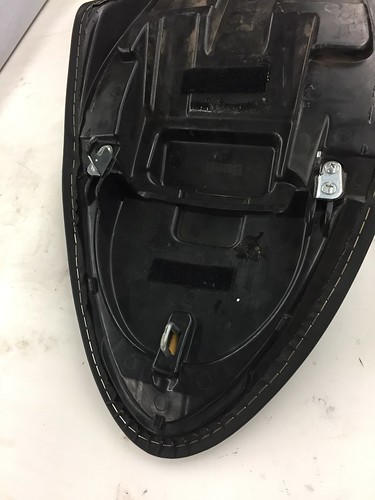
    Lots of ways to remove staples, even the classic "staple remover" can work, but usually need a thicker padded material to get under the staple. With this hard material and the plastic base I like to use small, SHARP, side cutters.
    IMG_0998 by Cooter!, on Flickr

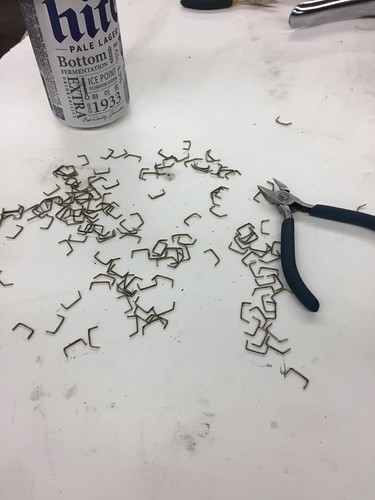
    get comfy... you'll be doing this for awhile. 179 times. Not that I was counting
    IMG_1003 by Cooter!, on Flickr

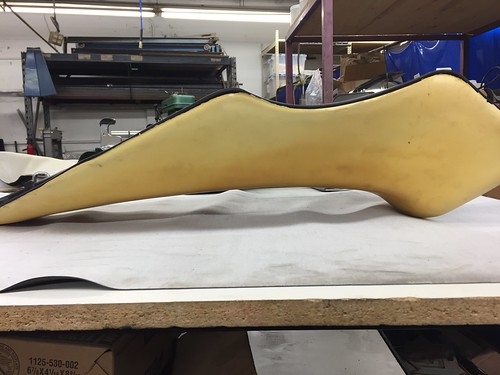
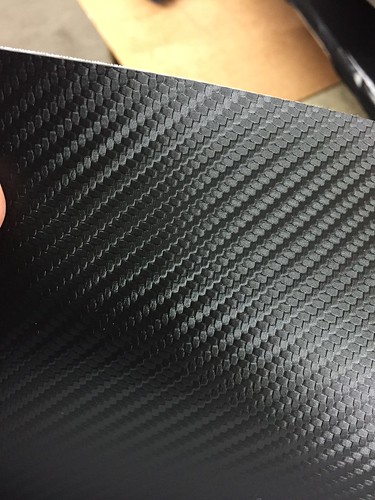
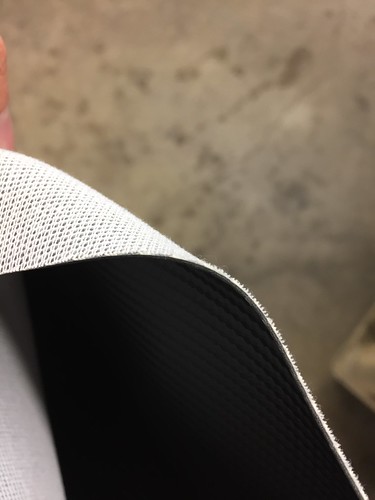
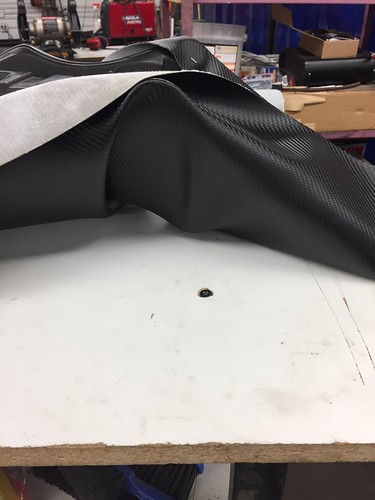
    Of course, you got all your supplies first right?? You'll need good material. Marine vinyl is more expensive and mandatory for doing it right. I got one yard for the grand total of $14. Remember one yard is 3' long but still the length of the whole roll. It's enough to do this 2 or 3 times! I found this Carbon Fiber look, but there was all sorts of options. Look in the scrap bin! You only need about 3'X2'. The rainbow sparkle was VERY hard to resist!

    IMG_0999 by Cooter!, on Flickr
    IMG_1001 by Cooter!, on Flickr
    Last edited by Cooter; 08-30-2017 at 01:19 AM.

  3. #3
    Senior Member Cooter's Avatar
    Join Date
    Dec 2012
    Location
    Crawling up your skirt
    Posts
    10,897
    and of course staples. Stainless won't last outside as long as you'd think! but Monel staples are well worth the added cost $17 because they'll last forever.
    Don't get 1/2" staples:
    IMG_1002 by Cooter!, on Flickr
    They're too long. You need 1/4" staples. And a really good staple gun. The staples have to be seated all the way down or the material will just tear through them. If you can buy borrow or steal an electric or pneumatic one, thats the way to go.

    Pull off the nasty cover and don't try to guess what the taint stain is from. Damn you Taco Bell
    IMG_1004 by Cooter!, on Flickr

    check the condition of the foam, any worn spots will be obvious when you're done so fix them now by shaving them smooth or using more foam to repair it.

    Feel free to take the time to write insprirational messages you'll remember
    IMG_1005 by Cooter!, on Flickr

    You can use the old nasty cover as a pattern for more difficult projects, but these Buell seats are so flat it's unnecessary. Lay out your fabric face down on a clean smooth bench because even a wood top will mark up the material as your stretching it later. Then lay your seat upside down on it.
    IMG_1006 by Cooter!, on Flickr
    Last edited by Cooter; 08-30-2017 at 01:10 AM.

  4. #4
    Senior Member Cooter's Avatar
    Join Date
    Dec 2012
    Location
    Crawling up your skirt
    Posts
    10,897
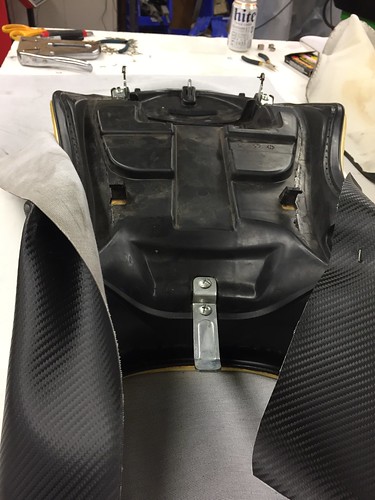
    See where the seat is the farthest from the material? Right near the front? That where you start. You do that because if you staple the front and back first, you'll never be able to stretch it far enough to match the curve.
    IMG_1007 by Cooter!, on Flickr

    Just one staple on each side for right now, you could very possibly be removing them again, after all this is your first time right? (Thats what they all say )
    IMG_1008 by Cooter!, on Flickr

    flip it over and your can start stretching it tight along both sides, putting a positioning staple every 6" or so
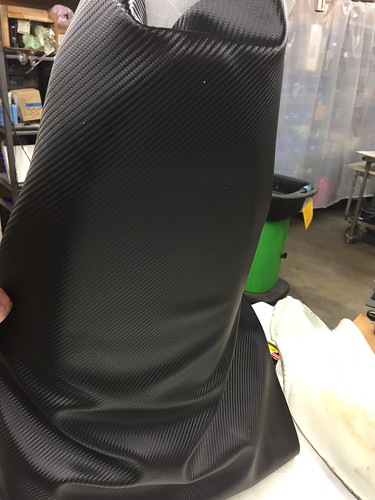
    IMG_1010 by Cooter!, on Flickr

    Getting there! but still needs a little help in the middle.
    IMG_1012 by Cooter!, on Flickr

    Cheap heat gut to the rescue!
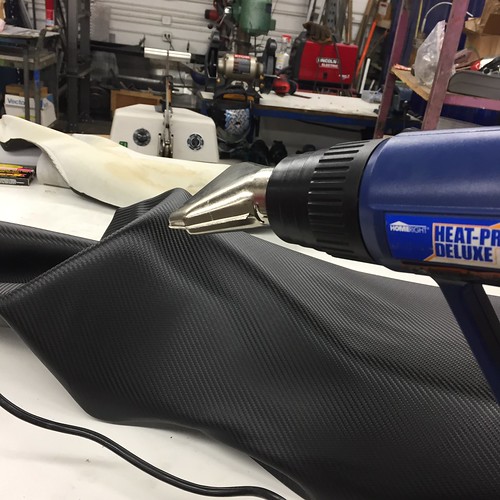
    IMG_1013 by Cooter!, on Flickr

    Do NOT get it too hot. Warm is fine and will let you pull the material without tearing it.

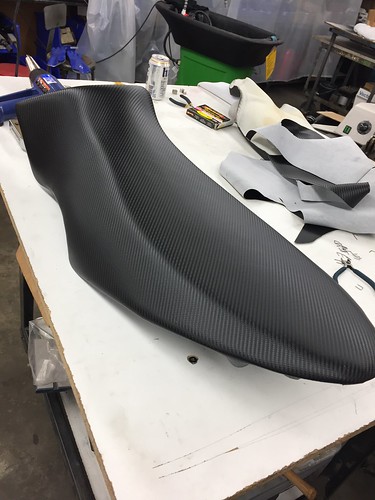
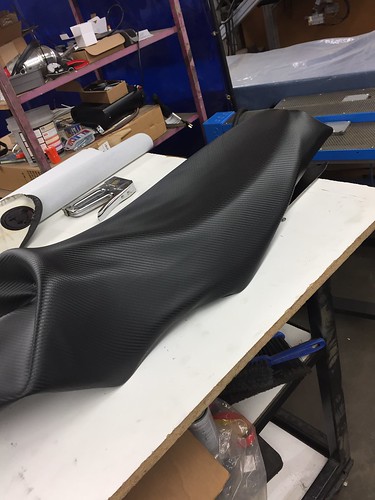
    Starting to look like a seat again!
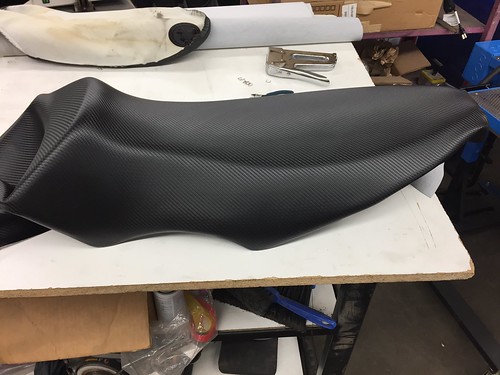
    IMG_1014 by Cooter!, on Flickr

  5. #5
    Senior Member Cooter's Avatar
    Join Date
    Dec 2012
    Location
    Crawling up your skirt
    Posts
    10,897
    Looking goooood! Note the front section. You won't be able to stretch the material back on itself that far without cutting the excess around where the airbox cover goes.
    IMG_1019 by Cooter!, on Flickr

    And be sure to cut and wrap the front corners the way the stock seat was. Most Buellers take the seat off and set it on the front corners to lean it on something. DON'T do that!! Lame. It damages almost every single XB seat I've seen.

    Ya baby!
    IMG_1020 by Cooter!, on Flickr

    It really is that easy! Quit being a sissy and try it
    Last edited by Cooter; 08-30-2017 at 01:23 AM.

  6. #6
    Senior Member Chicknstripn's Avatar
    Join Date
    Aug 2014
    Location
    High Point, NC
    Posts
    2,144
    Nice work and nice wrap up!

    No one wants a nice Cooter on a nasty ripped seat!

  7. #7
    Banned
    Join Date
    May 2014
    Location
    Seattle
    Posts
    1,636
    Thank you for sharing your knowledge.

    What kind of carbon fiber air box cover do you use? Does it fit good? Where did you buy it? How it performs?

    Last edited by TPEHAK; 08-30-2017 at 01:46 AM.

  8. #8
    Senior Member GregoXB's Avatar
    Join Date
    Feb 2012
    Posts
    1,543
    Nice work, but I hate the ergos of that seat... "Urban Assault Seat" I believe. I had that on for a week and got rid of it. Every time I hit the throttle the bike would try to throw me off the back and drive off, leaving me behind on the highway. LOL

  9. #9
    Senior Member Cooter's Avatar
    Join Date
    Dec 2012
    Location
    Crawling up your skirt
    Posts
    10,897
    Chicken: You know you like my nasty Cooter

    TPHAK: I got it from a forum member to replace the chinese one I had. The chinese one (with the scoops) was really thin and the mounting holes were wearing through just from the Buellvibration. Was annoyingly loud through the intake at WOT. Now that I have the SX, I do WOT on the XB way too often This one (brand unknown) fits better but not perfect, is much thicker/quieter, no scoops, and even no breather hole in front by the tank filler. My plans (open airbox) is to add some cool breather holes in it and give it a good polish. I hear theres a thread I should read about polishing

    Grego: Ya it's the UAS. I've had a lot of different seats on this thing and even though they are a very personal choice, I like this one better than a few 'comfort' seats I've had, even for long distance. Theres no buttpad to hold you in, but an STT is supposed to be a dirt-ish bike you can move around on. I honestly think its a material thing. The stock material is really hard and plastic-y making it slippery (like a dirt bike). This new CF looking material is much softer and has a bit better grip. I also have the good habit of not holding the bike by the bars with my hands. It's all in the thighs baby!

  10. #10
    Senior Member Restlessrustler's Avatar
    Join Date
    Jun 2012
    Location
    Hamilton NJ
    Posts
    859
    Cooter, nice work man! I always wanted to try that....you made it look easy!


Page 1 of 2 12 LastLast

Posting Permissions

  • You may not post new threads
  • You may not post replies
  • You may not post attachments
  • You may not edit your posts
  •