Page 1 of 2 12 LastLast
Results 1 to 10 of 14

Thread: DIY upgrade to ZTL2

  1. #1
    Senior Member
    Join Date
    Mar 2014
    Location
    Jacksonville, FL
    Posts
    302

    DIY upgrade to ZTL2

    I planned on having a shop do the swap for me, since I've never messed with brakes before, but when you have three days off in a row and nothing to do...

    (This is upgrading to ZTL2 on a '03 xb9sl - yours may be different)

    Step 1) Get the bike up in the air


    Step 2) Get the fender and front wheel off.


    Tip) I found it tough to get the front wheel off with the front head stand in place. I supported the bike fron the front jack position on the muffler and removed the head stand to get enough clearance for the rim above the caliper. The I put the head stand back in place.

  2. #2
    Senior Member
    Join Date
    Mar 2014
    Location
    Jacksonville, FL
    Posts
    302
    Step 3) Get your original front brake off.

    Since I was replacing everything, I removed it all as one assembly, and never had to drain the fluid.

    Starting from here:


    Remove the P clamp on the lower triple:


    Remove the two caliper bolts:


    Remove the front master cylinder and lever assembly:

  3. #3
    Senior Member
    Join Date
    Mar 2014
    Location
    Jacksonville, FL
    Posts
    302
    Step 3b) You're not done yet. The brake line is held in by one more clamp that is a pain in the butt to get to. It's on the back of the headlight module (right side).


    The biggest pain for me, was that no matter how much I tried loosening the nut, it wasn't actually loosening. I took off the front windscreen, and found that you have to secure it from the front in order to loosen it from the rear.


    Once that it removed, if you loosen the headlight module, you can squeeze the brake line out from between the module and the right fork tube. By doing that, you never have to break open the line and deal with draining fluid.

  4. #4
    Senior Member
    Join Date
    Mar 2014
    Location
    Jacksonville, FL
    Posts
    302
    Step 4) Start putting he new brakes on.

    Put on caliper and front wheel.
    Tip - I found it tougher to get the wheel over the bigger caliper, so I dropped the chin spoiler to give me more room to move the wheel.


    Install new master cylinder / lever assembly.

    The brake switch from '03 to the ZTL2 master cylinder are a little different.


    I know that I could probably bend the tabs to make it fit, but I don't want to risk breaking them off, so I took the endings off of a Buell harness that had ZTL2.


    And that's where I'm at. Time to take a break for lunch and to pick up some DOT4 brake fluid and some electrical connections to hook up the brake switch.

  5. #5
    Senior Member
    Join Date
    Mar 2014
    Location
    Jacksonville, FL
    Posts
    302
    Step 5 - Wrap it up

    I cut the ends off the ZTL2 brake switch connectors and attached them to my original brake switch wires:


    (I will put heat shrink over the wires - I just wanted to test everything out first)

    Your brake lights should come on when the lever is pulled.

    Since the dealer didn't have the coil wire for the brake line in stock, I removed the original one from the ZTL brake line and moved it over to the new line.


    The last step should be to bleed the brakes.

    I've been squeezing my lever for the last ten minutes, and I don't have any pressure building up and nothing is coming out of the bleeder, so I have to do some research as to why. When I figure it out, I'll be back here to finish up my posts.

  6. #6
    Senior Member SEXT9's Avatar
    Join Date
    Jul 2011
    Location
    Greensburg, IN
    Posts
    737
    I usually use a vacuum pump to bleed the brakes along with squeezing the lever

  7. #7
    Senior Member ToneTheMoan's Avatar
    Join Date
    Nov 2011
    Location
    LONDON ENGLAND
    Posts
    1,967
    ^^^ yeah that vacuum works best for me too!

  8. #8
    Inactive
    Join Date
    Feb 2011
    Location
    AmishLand, PA.
    Posts
    7,526
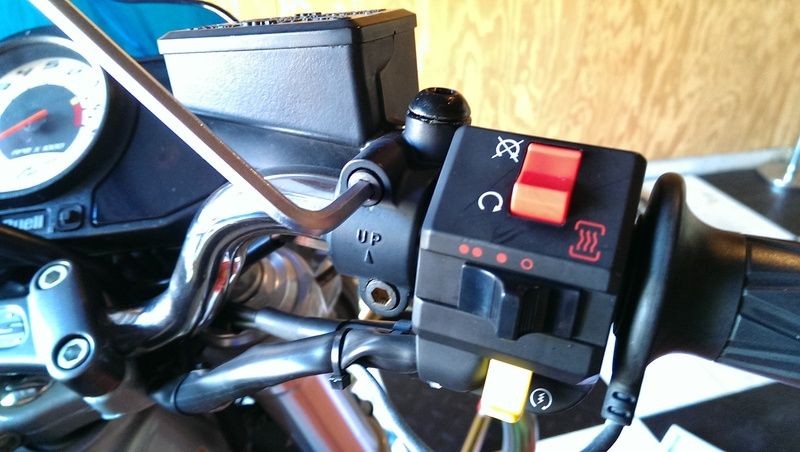
    can't bleed? no access to mity-vac vacuum bleeder? try this: remove master cylinder cap. remove all fluid. swab out bottom of reservoir. now look at the tiny hole in floor of reservoir? is it perfectly clean and free of any debris/goop? if so good. fill with dot-4, replace cap...and now feather pump the lever with the bleeder valve closed. this is an action where you're are lightly pumping the brake lever as absolutely fast as possible. don't worry about fully depressing the lever to the grip. just pump the hell out of it as quickly as humanly possible. start to feel a tad bit of pressure? you're on the way son. do it some more....then hold lever to grip...open bleeder and expel air. follow this sequence a few more times and i assure you it will bleed off.

  9. #9
    Senior Member
    Join Date
    Mar 2014
    Location
    Jacksonville, FL
    Posts
    302
    Thanks all. I watched a handful of YouTube videos showing the vacuum pump from Harbor freight, so I went out and bought one. Got back home, and after chatting with the neighbor for a while, finished it up. Drove around the neighborhood a little and seemed good. I'm off tomorrow, so I'll head out and take some easy roads first before I dive into traffic.


    I wanted to get a pic of it all installed on the bike, but it was dark. I'll try to get a nice shot or two tomorrow.

    Time spent in the garage doing the upgrade - about 2.5 hours. Knowing what I'm doing now, I could probably do it again in an hour to hour and a half.

    If anyone wants to do the swap and has any questions, feel free to ask away.

  10. #10
    Senior Member ToneTheMoan's Avatar
    Join Date
    Nov 2011
    Location
    LONDON ENGLAND
    Posts
    1,967
    Good write up well done! and as always good advice from others too and thats why i love this forum!


Page 1 of 2 12 LastLast

Posting Permissions

  • You may not post new threads
  • You may not post replies
  • You may not post attachments
  • You may not edit your posts
  •