Reply With Quote
Jardine... "Crafted with pride"
... lol sorry that made me laugh!
Maskido Legit bike man!


H7which bulb type is required?
& yes i did run it without pipes. It made me jump even thought I was bracing for a loud bang! Crazy. But the Jardine is AWESOME. People can't help but look. Well worth the $$$$ esp. for the price I paid.
Jardine... "Crafted with pride"
... lol sorry that made me laugh!
Maskido Legit bike man!
Maskido, I ordered my HID from DDM right after I saw your pictures. Thanks. Do you have any difficulty on installing the HID - I'm just doing the low beam. Any hint or special procedures you can tell me before I start? Thanks.
Just the low beam? Nope. It is THAT easy. Couple things:Do you have any difficulty on installing the HID - I'm just doing the low beam.
- Having no instructions or reference to work from, I removed the headlamp housing from the bike so I could have it on my workbench & figure stuff out. In order to do so, you'll have to cut a zip-tie bunching all the wiring together to disconnect the headlight connection. (In hindsight, I could've done the install without this step, but it's always nice to have the room and freedom from things hanging down.)
- See the above post if you have any questions regarding polarity (+ or - of the wires.)
- The bulb protector (clear housing): Top part spins off, the bottom you'll have to cut/break to remove from the harness (DO NOT TOUCH BULB WITH BARE SKIN.)
- The only cutting required of the bike components (other than a zip-tie) is the circle cut-out on the weather proof housing. Just cut along the circles edge in the middle of the piece. You'll see what I mean. Make sure to use a super sharp razor & it'll be clean.
- I stuck the ballast (w/ provided double sided tape) above the headlamp, below the windscreen, on the left hand side. There is plenty of room, plus the other side is available should you install the high-beam.
Again, the job is super easy. The above are just small things that will make it go even smoother. Once you get into installing the high-beam, that's where I had to scratch my head a lil to figure out how the bulb was going to stay in the holder (oddly, it has a different mounting method. Hard to explain but once you'll see it, you'll know what everyone keeps talking about.)
Feel free to ask any questions. Have fun!
Oh yeah,
One thing I overlooked and have yet to do is replace the little center light that is wedged between the low & high beams:
(From the Owners Manual)
Bulb, running lamp part #53436-97 5watt 0.37amps
It detracts from the overall look due to its dingy yellowish color. I'll prob either unplug it or try & find a replacement. Even considered what it would look like if I threw in a RED bulb to accent the red on my bike... but dunno if that would look cool or dumb in contrast to the bluish hue of the 6000k bulbs. Won't know til I try.
My next mod would be to remove those chicken strips.
Ba-Da-Boom! Que the rimshot! Haha...:DMy next mod would be to remove those chicken strips.
New bike + winter roads = No crazy riding.
But I agree, come summer...
Great job man!
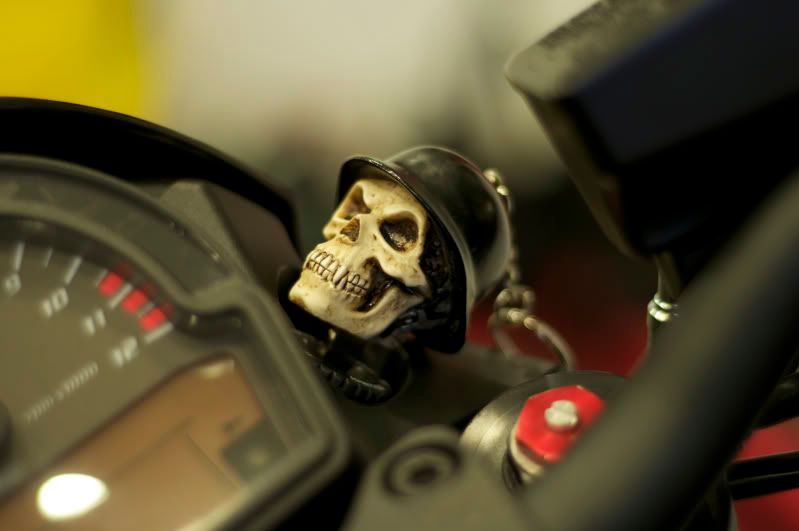
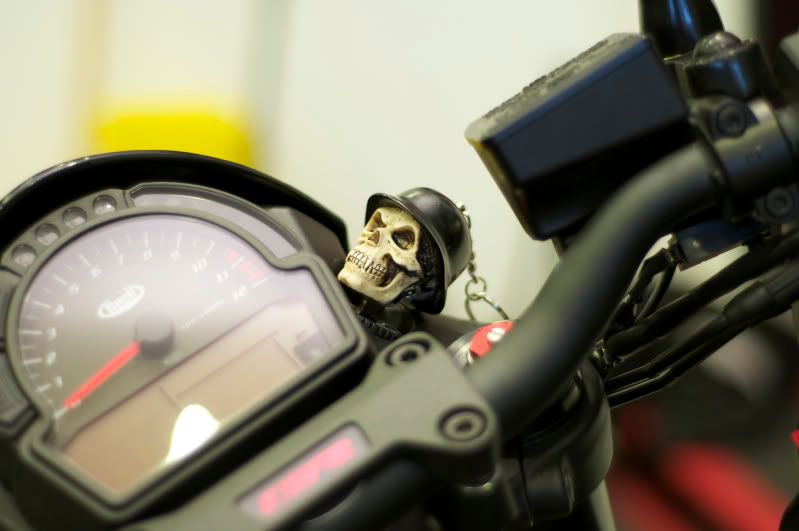
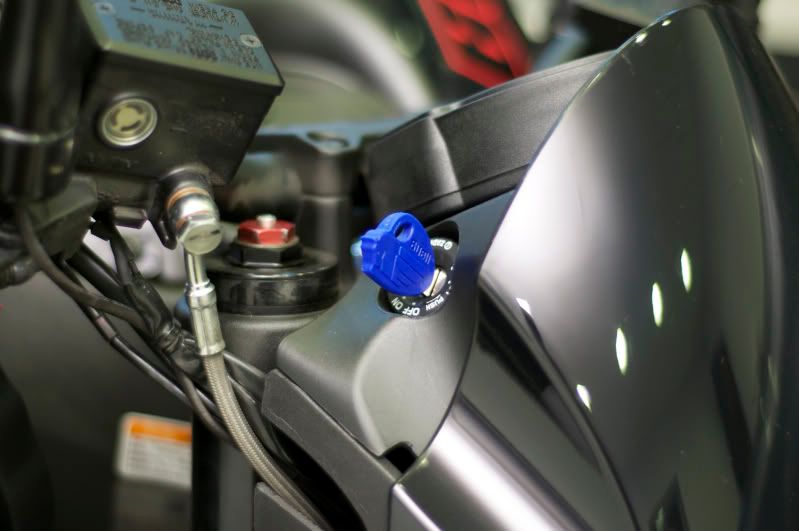
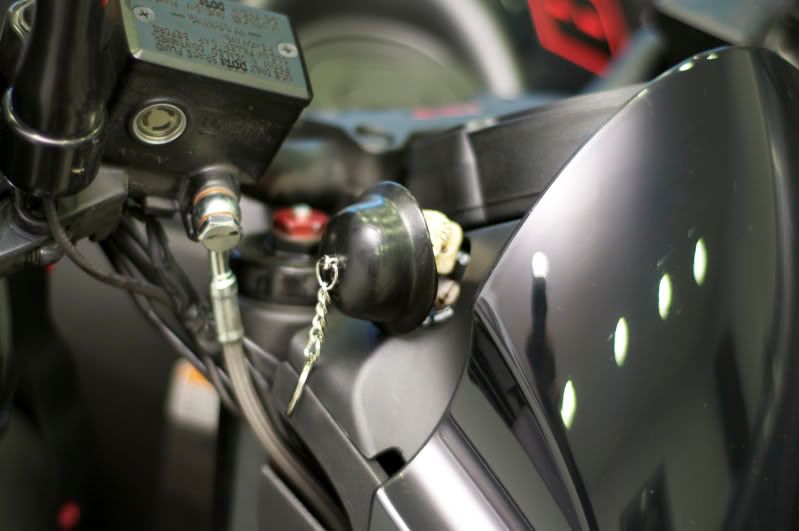
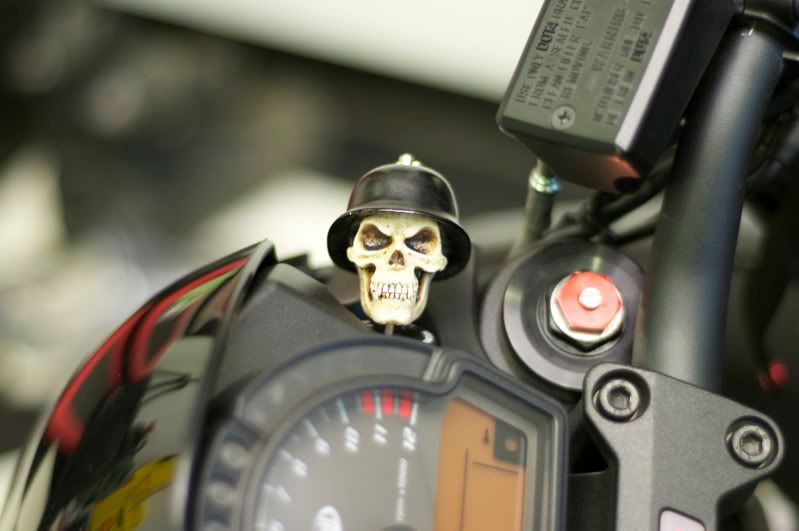
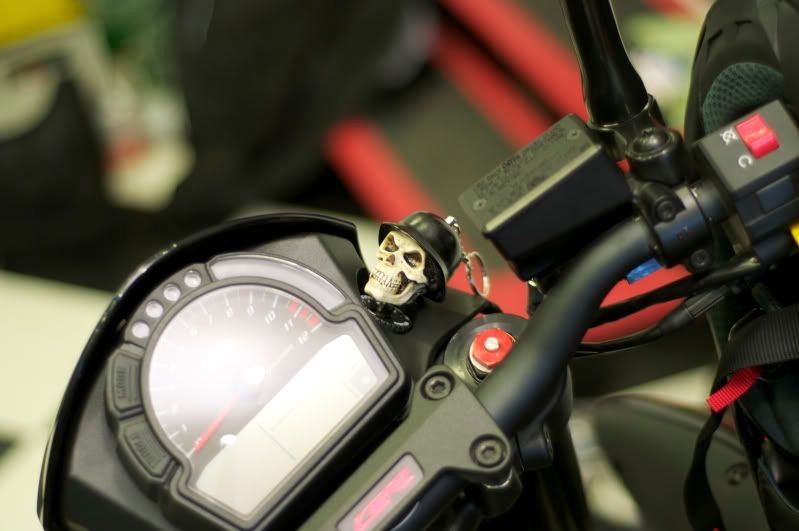
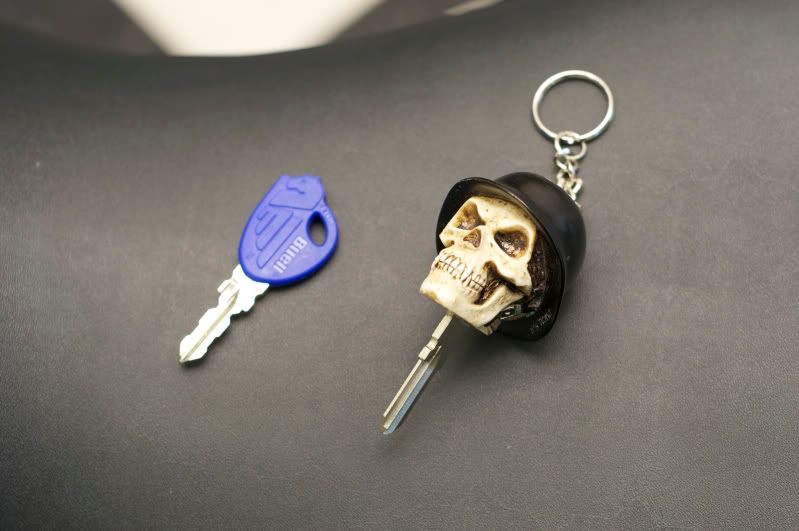
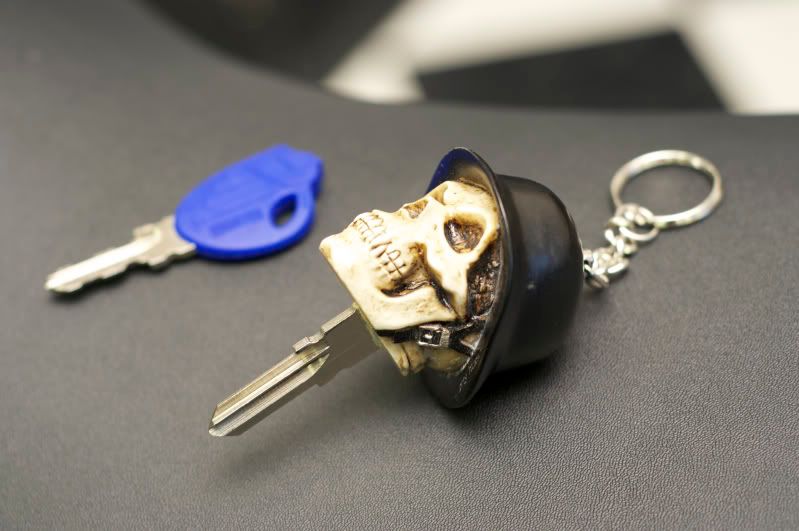
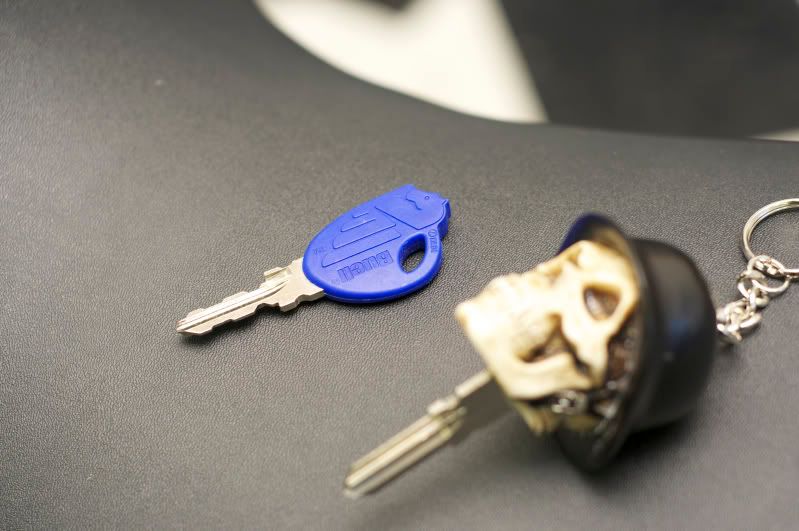
And for the next mod: Custom Key! Been wanting to do this ever since I've known that they make these. It ended up bigger than I had envisioned, but in all honesty I wouldn't have it any other way. Anything smaller would have been swallowed up by the bike. Not really a key you throw in your pocket & forget about... but with a key this cool, why wouldn't you want to leave it out on the table?
Anyways, I got this at HARDCORE-KEYS for $35 delivered & recommend them HIGHLY. I have yet to get it cut (they offer free key cutting if you mail them a spare key & they mail both back) but should be done today. As far as customer service goes, I had a question & received a response via email & phone call by the owner immediately! Spoke to him & he mentioned that they are updating their site so new stuff is on it's way along with their already badass selection. Anyways, here are a few pics. I like!

that is a sweet key. where did you get it?
 Posting Permissions